สอนใช้งาน Docker ร่วมกับ Python (Flask) สุดง่ายสำหรับมือใหม่

ในบทความนี้เราจะมาสร้าง Python App เพื่อรันใน Docker Container โดยแอปนี้จะเป็น Random App เมนูอาหารไทย จากนั้นเราก็จะมีการแชร์ตัว Docker Image ของเราไปให้คนอื่นได้ใช้งานผ่าน Docker Hub กันด้วยครับ
ปล.ในบทความนี้จะไม่ได้อธิบายแนวคิดของ Docker มากนัก โดยจะทำเป็นบทความแยกโดยเฉพาะสำหรับผู้เริ่มต้นไว้อีกบทความแยกต่างหากครับ
Docker Overview
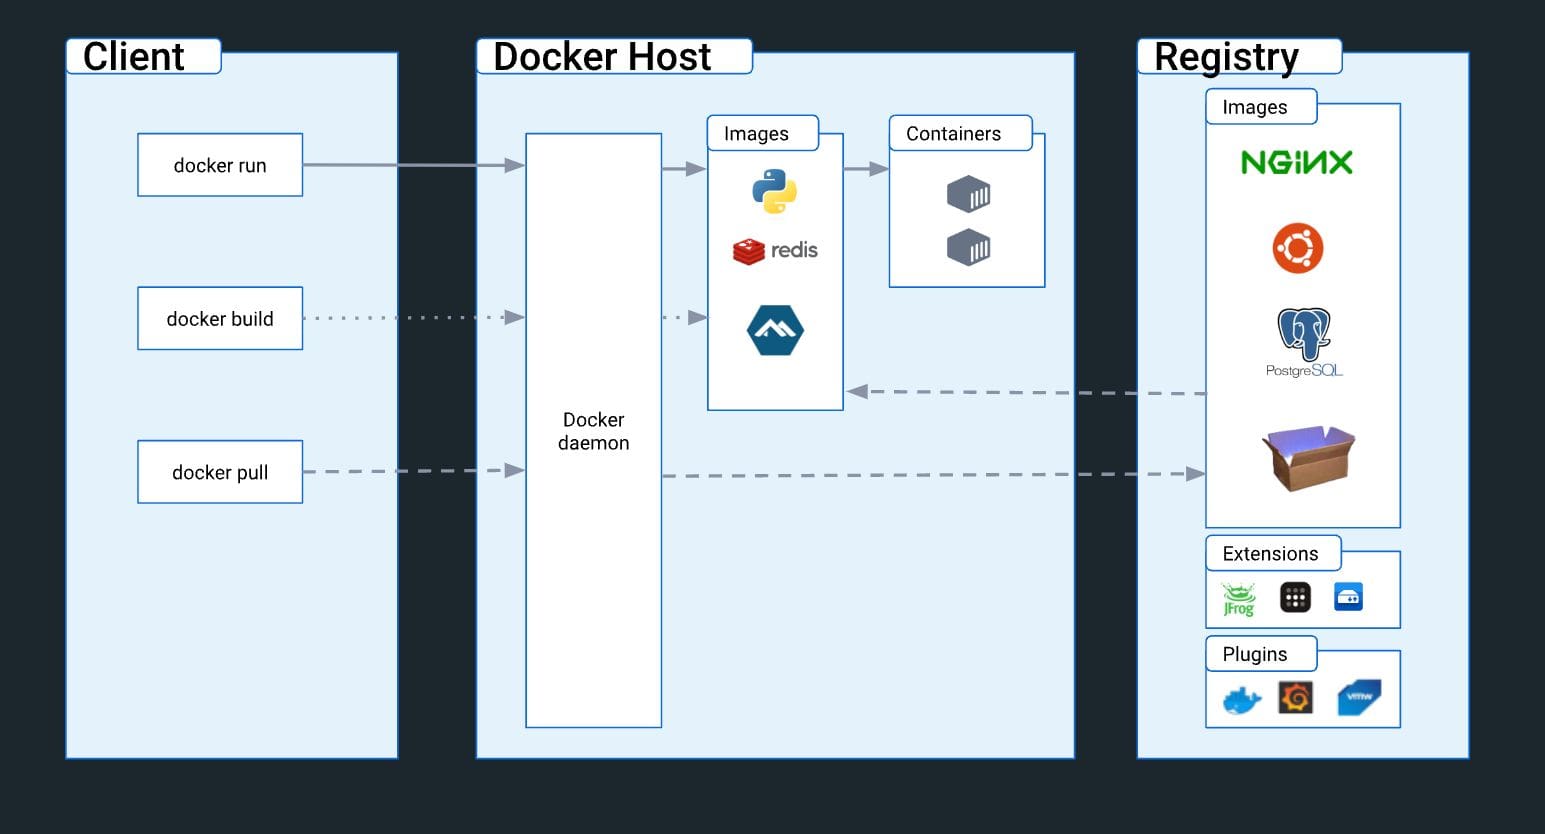
โครงสร้างภาพรวมของ Docker (Photo Credit: Docker Official)
ตัวอย่างแอพทดสอบของเราในวันนี้

เมื่อกด random จะได้เมนูอาหาร
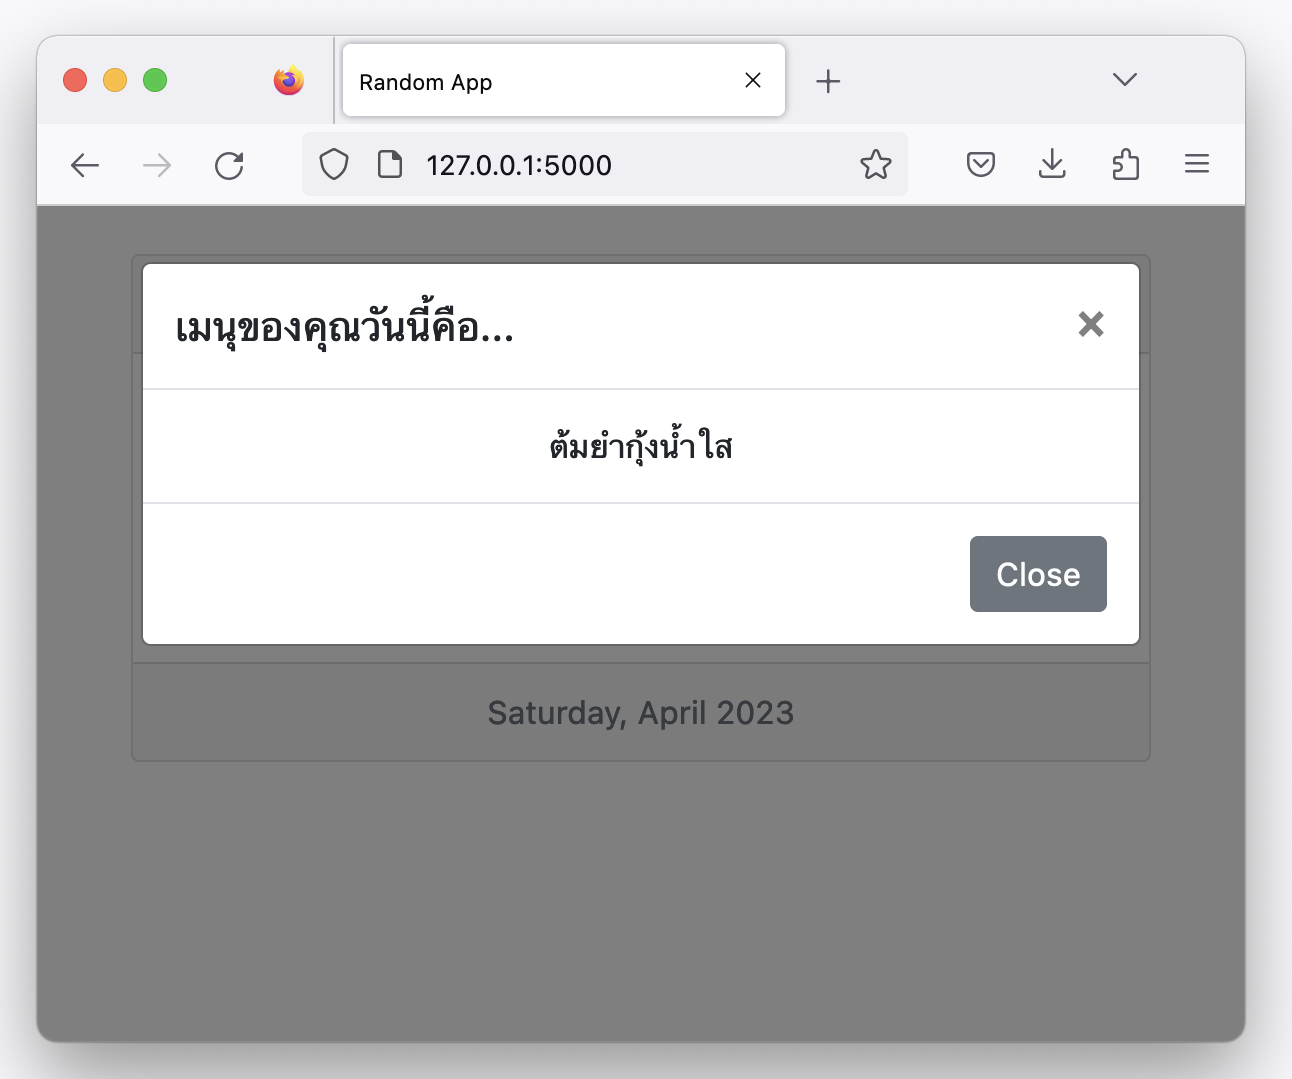
เราจะนำ Random Menu App ตัวนี้แหละครับไปรันใน Docker Container และส่งให้คนอื่นได้ใช้งานกัน
Prerequisites
- Docker ติดตั้งในเครื่องเรียบร้อย
- ในกรณีเป็น Windows ต้องเป็น Windows 10 ขึ้นไป (เพราะจะสามารถติดตั้ง WSL: Windows Sub-system Linux ได้)
- พื้นฐาน Python และ Flask เฟรมเวิร์ค
Note: สำหรับเพื่อน ๆ ที่ต้องการเรียนแบบจัดเต็ม ทางเราก็มี คอร์สเรียน Docker แบบจัดเต็ม สอนทั้งระดับองค์กรและสอนแบบกลุ่ม
สร้าง Python (Flask) App และ Docker Container
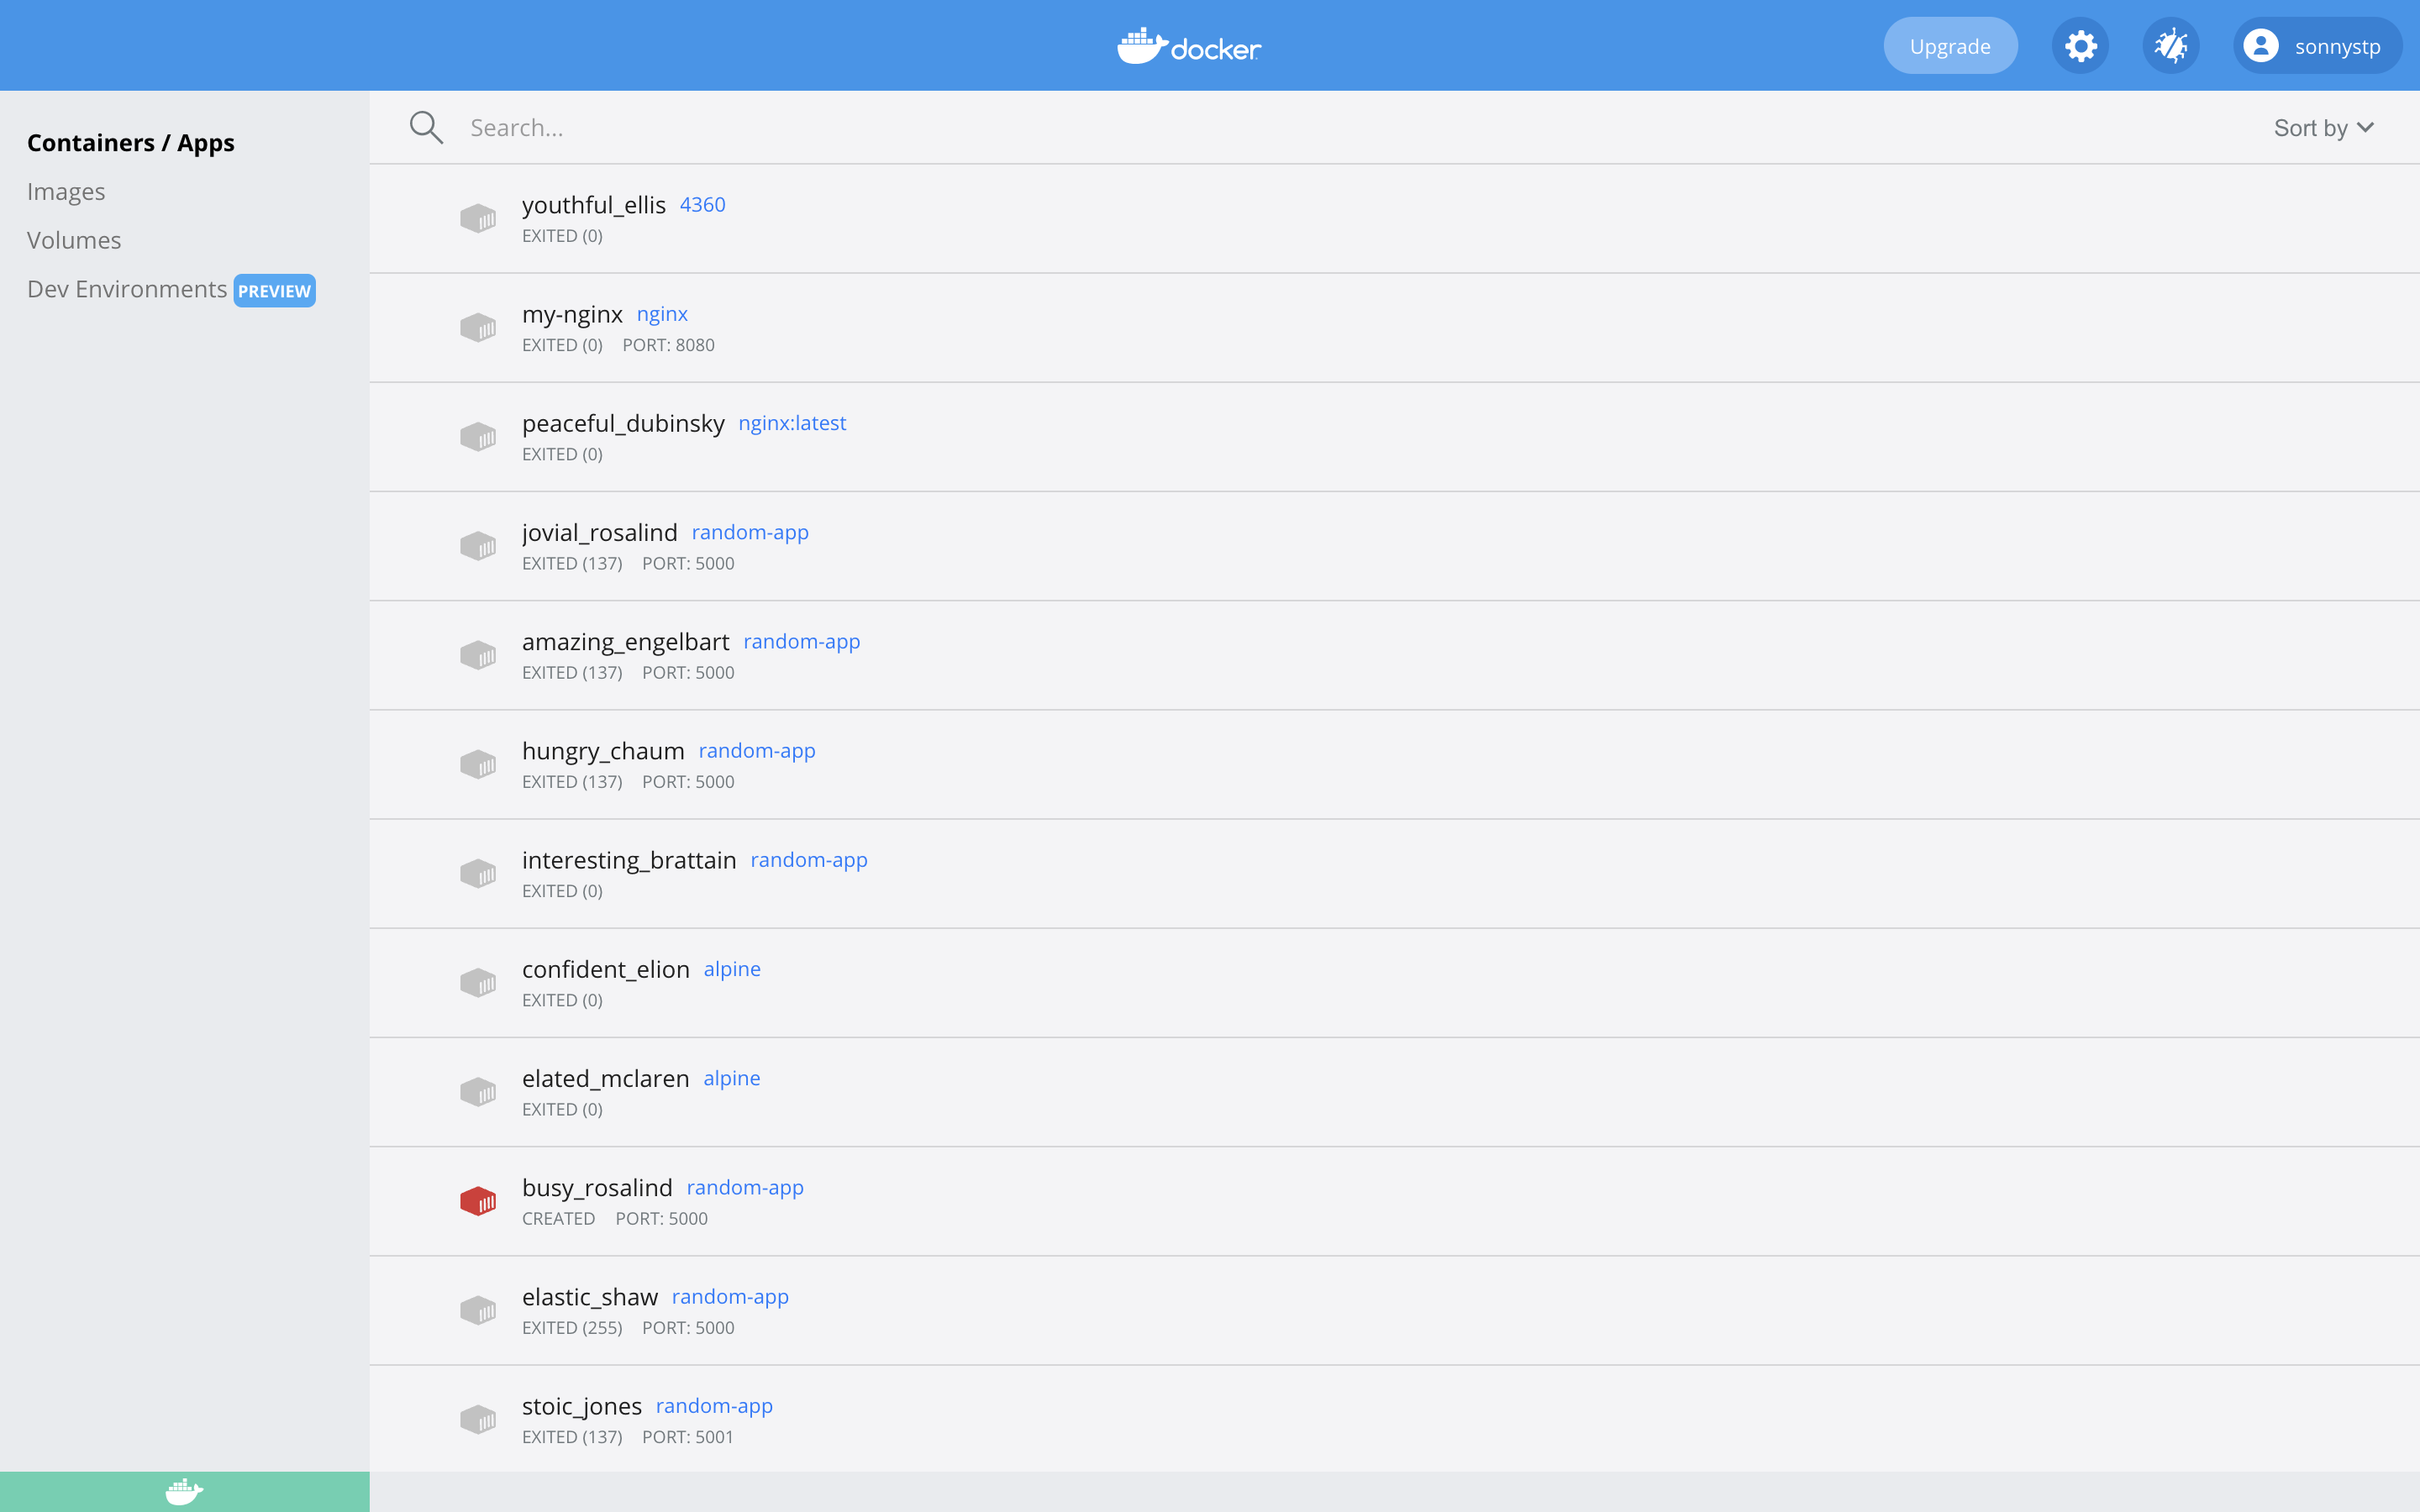
1. เปิด Docker Desktop ของเราขึ้นมาไว้รอก่อนเลย (อันนี้ผมใช้ Mac นะครับ ถ้าใครที่ยังไม่ได้ติดตั้งก็สามารถเข้าที่ลิงก์นี้ Docker Desktop Download)
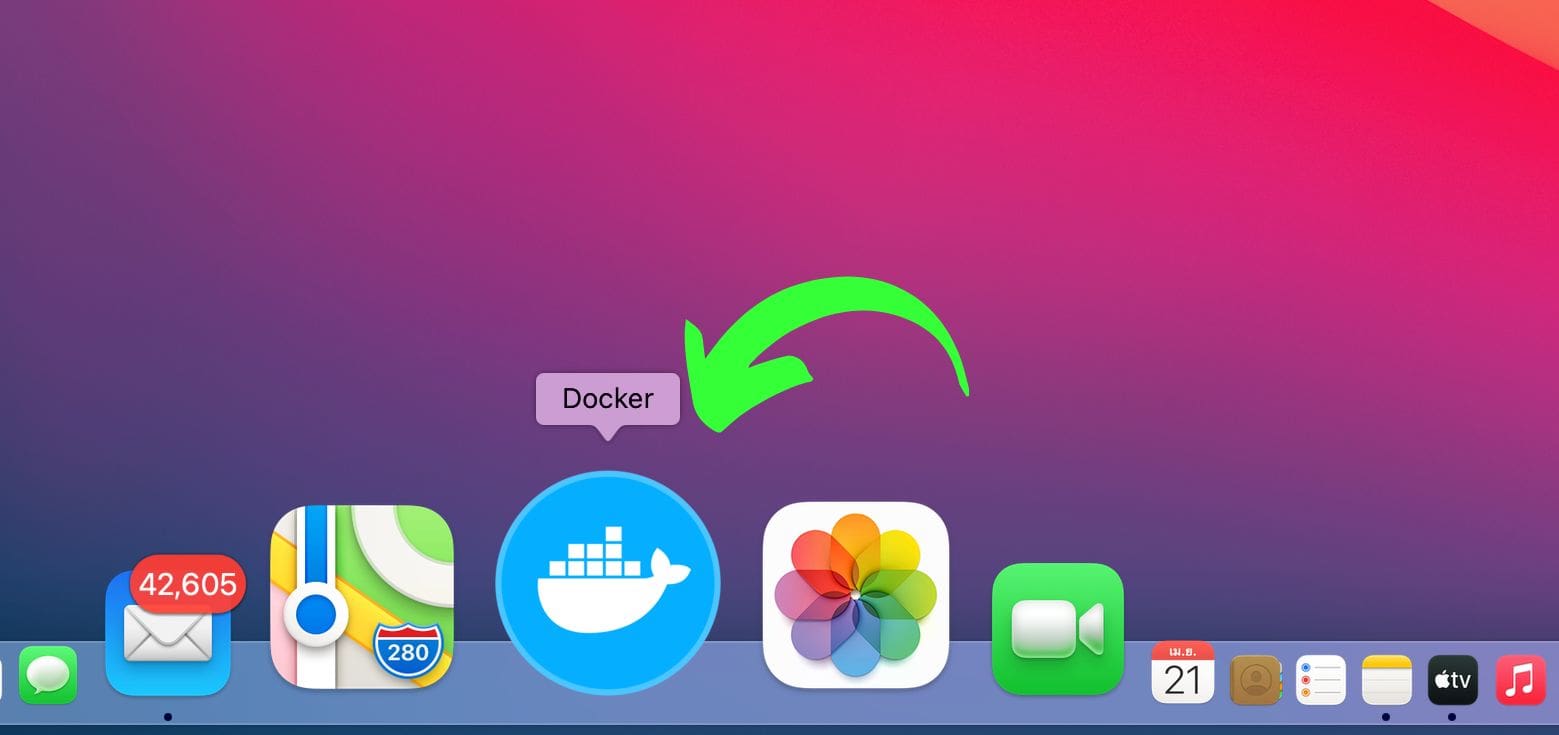
เปิดขึ้นมาแล้วจะได้หน้าต่างแบบนี้แสดงผลขึ้นมา ก็เป็นอันว่าเราพร้อมที่จะลุย Docker กันแล้ว
2. สร้างโฟลเดอร์และไปยังโฟลเดอร์โปรเจคท์ของเรา
$ mkdir random_app && cd random_app
3. ติดตั้ง Flask
$ pip install flask3. สร้างไฟล์ดังต่อไปนี้
|____ app.py
|____ random_app.py
|____ data.csv
|____ templates/index.html
|____ requirements.txt
|____ Dockerfile- app.py คือ Python ไฟล์ที่จะใช้เขียน Flask app
- random_app.py คือ ไฟล์ที่เราจะใช้จัดการกับ CSV ไฟล์ รวมถึงเขียนลอจิก Random App
- data.csv คือ ไฟล์ข้อมูลที่เราจะใช้ใน Random App ของเรา
- index.html คือ ไฟล์ที่ใช้แสดงผลหน้าเว็บของ Random App (ต้องสร้างโฟลเดอร์ templates ขึ้นมาก่อน)
- requirements.txt คือ ไฟล์ที่เก็บ packages และ libraries ของโปรเจคท์
- Dockerfile คือ ไฟล์ของ Docker ที่เอาไว้ใช้รันคำสั่งต่าง ๆ ของ Docker
random_app.py
import csv
import random


def get_random_menu():
    try:
        with open('data.csv', 'r') as file:
            reader = csv.reader(file)
            next(reader) # Skip the header
            data = list(reader) # Convert iterator to list

        if not data:
            return "No data available"

        random_menu = random.choice(data) # Select one random menu

        # Use join to convert the list to a string and strip
        # to remove leading/trailing whitespace
        final_random_menu = ' '.join(random_menu).strip()

        return final_random_menu

    except FileNotFoundError:
        return "The data file was not found"
    except Exception as e:
        return f"An error occurred: {e}"

print(get_random_menu)
app.py
from flask import Flask, render_template
import datetime
from random_menu import get_random_menu


app = Flask(__name__)


@app.route('/')
def home():
    menu = get_random_menu()
    today = datetime.datetime.now().strftime("%A" ", " "%B" " " "%Y")

    return render_template(
        "index.html",
        today=today,
        menu=menu,
    )


if __name__ =="__main__":
    app.run(debug=True, host="0.0.0.0")
data.csv
กระเพาะปลาน้ำแดง
ก๋วยเตี๋ยวคั่วไก่
กุ้งอบวุ้นเส้น
แกงเขียวหวานไก่
แกงเลียงกุ้งสด
ไก่ผัดเม็ดมะม่วงหิมพานต์
ต้มข่าไก่โบราณ
ต้มยำกุ้งน้ำใส
index.html
<!DOCTYPE html>
<html>
<head>
<meta name="viewport" content="width=device-width, initial-scale=1">
<link rel="stylesheet" href="https://cdn.jsdelivr.net/npm/[email protected]/dist/css/bootstrap.min.css" integrity="sha384-B0vP5xmATw1+K9KRQjQERJvTumQW0nPEzvF6L/Z6nronJ3oUOFUFpCjEUQouq2+l" crossorigin="anonymous">
<title>Random App</title>
</head>
<body>
<div class="container">
<br>
<div class="card text-center">
<div class="card-header">
Random App by <a href="https://stackpython.co/authors/sonny">devhub.in.th</a>
</div>
<div class="card-body" id="myDIV">
<h5 class="card-title">Click the button to see the winners</h5>
<p class="card-text">Congrats to ...</p>
<button type="button" class="btn btn-primary" data-toggle="modal" data-target="#exampleModal">
Random
</button>
</div>
<div class="card-footer text-muted">
{{ today }}
</div>
<!-- Bootstrap Modal -->
<div class="modal" tabindex="-1" role="dialog" id="exampleModal">
<div class="modal-dialog" role="document">
<div class="modal-content">
<div class="modal-header">
<h5 class="modal-title">Congrats to</h5>
<button type="button" class="close" data-dismiss="modal" aria-label="Close">
<span aria-hidden="true">×</span>
</button>
</div>
<div class="modal-body">
{{ menu }}
</div>
<div class="modal-footer">
<button type="button" class="btn btn-secondary" data-dismiss="modal" onclick="location.reload()">Close</button>
</div>
</div>
</div>
</div>
</div>
</div>
<script src="https://code.jquery.com/jquery-3.5.1.slim.min.js" integrity="sha384-DfXdz2htPH0lsSSs5nCTpuj/zy4C+OGpamoFVy38MVBnE+IbbVYUew+OrCXaRkfj" crossorigin="anonymous"></script>
<script src="https://cdn.jsdelivr.net/npm/[email protected]/dist/js/bootstrap.bundle.min.js" integrity="sha384-Piv4xVNRyMGpqkS2by6br4gNJ7DXjqk09RmUpJ8jgGtD7zP9yug3goQfGII0yAns" crossorigin="anonymous"></script>
</body>
</html
สร้าง requirements.txt ไฟล์
$ pip freeze>requirements.txtrequirements.txt (จะมี libs ประมาณนี้)
click==8.1.3
Flask==2.2.3
itsdangerous==2.1.2
Jinja2==3.1.2
MarkupSafe==2.1.2
Werkzeug==2.2.3
สร้าง Dockerfile
Dockerfile คือ ไฟล์ที่ประกอบไปด้วย instruction commands ต่าง ๆ ที่เอาไว้ใช้สำหรับสร้าง Docker Image
# syntax=docker/dockerfile:1
FROM python:3.9-slim-buster

WORKDIR /app

COPY requirements.txt requirements.txt

RUN pip3 install -r requirements.txt

COPY . .

CMD [ "python3", "-m" , "flask", "run", "--host=0.0.0.0"]
คำอธิบาย
- FORM คือ คำสั่งเพื่อ pull ตัว base Image ยอดนิยมที่สุดและมีน้ำหนักที่เบามากตัวหนึ่งชื่อ slim-buster จาก Docker Hub โดยเลือกเวอร์ชัน Python 3.9
- WORKDIR คือ การกำหนดตัว root working directory ชื่อว่า /app ใน Docker Container
- COPY คือ การคัดลอกไฟล์ requirements.txt
- RUN คือ คำสั่งในการรันบางส่วน โดยในที่นี้เป็นการติดตั้งแพ็คเกจต่าง ๆ ที่อยู่ในไฟล์ requirements.txt
- COPY คือ การคัดลอกทุกสิ่งทุกอย่างใน Random Menu App โปรเจคท์ของเราทั้งหมดไปที่ Docker Container
- CMD คือ การรันโปรเจคท์ (เปรียบเสมือนตอนเรารัน python app.py ในเครื่องของเราเพื่อให้รันโปรเจคท์ได้) เพียงแต่ใน CMD ในนี้จะแบ่งออกมาเป็น 5 อากิวเมนต์ด้านบน โดยแต่ละตัวก็คั่นด้วยเครื่องหมาย "," (comma)
Docker Compose
สร้าง docker-compose.yml ไฟล์ขึ้นมาได้เลยครับเพื่อรัน Docker Container ซึ่งในที่นี้มี 1 container นั่นก็คือ "web" ซึ่งเป็น Flask web ของเรานั่นเอง
docker-compose.yml
version: "3.8"

services:
  web:
    build: .
    image: myapp:1.0
    ports:
- "5000:5000"- services : คือการกำหนด services (หรือเราจะเรียกว่ากำหนด Container ที่ต้องการรันก็ได้) ซึ่งในที่นี้กำหนดคอนเทนเนอร์ที่ชื่อว่า web ซึ่งก็คือเซอร์วิสหลักของ Flask App ของเรานั่นเองครับ (ในที่นี้แสดงว่าเรามี 1 service ก็คือ "web" ซึ่งถ้าโปรเจคท์ใหญ่ ๆ ก็จะมีเซอร์วิสเยอะหรือมีคอนเทนเนอร์เยอะขึ้นตามไปด้วยครับ) ชื่อนี้เราสามารถตั้งได้ตามที่เราต้องการ แต่แนะนำว่าตั้งชื่อให้เหมาะสมหรือสื่อความหมาย เพื่อให้เข้ากับโปรเจคท์หรือแอพที่เราพัฒนา
- build: . : บอกให้ Docker Compose สร้าง Image จาก "Dockerfile" ที่อยู่ในโฟลเดอร์ปัจจุบัน หรือโฟลเดอร์ที่เราทำงาน (Working Directory)
- image:myapp:1.0 เป็นการกำหนดชื่อและแท็กสำหรับ Image ที่จะถูกสร้างขึ้นมา ซึ่งเพื่อน ๆ สามารถเปลี่ยนตรง "myapp" ให้เป็นชื่อที่ต้องการ และเวอร์ชัน "1.0" เป็นเวอร์ชันที่สอดคล้องกับที่เรากำลังทำงานอยู่ได้เลยครับ
- ports ทำการแมพพอร์ต "5000"
จากภายในคอนเทนเนอร์ไปยังพอร์ต "5000" บนเครื่อง host
นี้เองทำให้เราสามารถเข้าถึงแอปพลิเคชั่น Flask
ของเราได้จากบนเบราว์เซอร์โดยใช้ URL "http://localhost:5000" หรือ "127.0.0.1:5000" ก็ตัวเดียวกัน
เสร็จแล้วรันคำสั่งด้านล่างเพื่อ build Image
$ docker-compose buildจะได้ output ประมาณนี้
sonny@MacBook-Pro-khxng-sonny random-app % docker-compose build
Building web
[+] Building 3.5s (11/11) FINISHED
 => [internal] load build definition from Dockerfile                                     0.0s
 => => transferring dockerfile: 37B                                                      0.0s
 => [internal] load .dockerignore                                                        0.0s
 => => transferring context: 2B                                                          0.0s
 => [internal] load metadata for docker.io/library/python:3.8-slim-buster                2.8s
 => [auth] library/python:pull token for registry-1.docker.io                            0.0s
 => [1/5] FROM docker.io/library/python:3.8-slim-buster@sha256:8799b0564103a9f36cfb8a8e  0.0s
 => [internal] load build context                                                        0.2s
 => => transferring context: 144.53kB                                                    0.2s
 => CACHED [2/5] WORKDIR /app                                                            0.0s
 => CACHED [3/5] COPY requirements.txt requirements.txt                                  0.0s
 => CACHED [4/5] RUN pip install -r requirements.txt                                     0.0s
 => [5/5] COPY . .                                                                       0.3s
 => exporting to image                                                                   0.1s
 => => exporting layers                                                                  0.1s
 => => writing image sha256:5557bc6ca37f8e94d3852d9105aaa9038e10dc5c7f8dd4b9b9023ca1dbf3  0.0s
 => => naming to docker.io/library/myapp:1.0                                             0.0s
sonny@MacBook-Pro-khxng-sonny random-app %
จากนั้นเราก็พร้อมรัน Docker Container ที่เราสร้างเมื่อสักครู่นี้แล้ว โดยรันด้วยคำสั่ง
$ docker-compose upOutput ตอนนี้ (รันสำเร็จแล้ว เปิด localhost:5000 หรือ 127.0.0.1:5000 ดูผลลัพธ์ได้เลยครับ)
sonny@MacBook-Pro-khxng-sonny random-app % docker-compose up
Creating network "random-app_default" with the default driver
Creating random-app_web_1 ... done
Attaching to random-app_web_1
web_1  |  * Environment: production
web_1  |    WARNING: This is a development server. Do not use it in a production deployment.
web_1  |    Use a production WSGI server instead.
web_1  |  * Debug mode: off
web_1  |  * Running on all addresses.
web_1  |    WARNING: This is a development server. Do not use it in a production deployment.
web_1  |  * Running on http://172.25.0.2:5000/ (Press CTRL+C to quit)
Build Docker Image
เราจะมาสร้าง Image พร้อม Tag โดยอย่างที่ได้อธิบายไปก่อนหน้าว่า Docker Image เปรียบเสมือนรวมคำสั่งต่าง ๆ ที่จะเอาไว้สร้าง Container อีกที โดย Image นั้นจะอยู่ในรูปแบบ Read-only Template (คือสามารถอ่านได้อย่างเดียวไม่สามารถทำการแก้ไขใด ๆ ได้ใน image ยกตัวอย่าง slim-buster ด้านบน ก็เรียกได้ว่าเป็นอีก Image หนึ่งที่เรา pull จาก Docker Hub เพื่อมาใช้งานใน Flask app ของเรา โดย Container หนึ่งก็สามารถมีได้หลาย Image
โดยให้เราสร้าง Docker Image ขึ้นมาใหม่ได้เลยด้วยคำสั่ง docker build [TAG] [IMAGE_NAME] . โดย Image ตัวนี้ผมขอใช้ชื่อว่า dockerizing-flask
$ docker build --tag dockerizing-flask .Build สำเร็จ จะได้ประมาณนี้ครับ
(env) sonny@MacBook-Pro-khxng-sonny random_app % docker build --tag dockerizing-flask .
[+] Building 20.0s (16/16) FINISHED
 => [internal] load build definition from Dockerfile                                                                               0.0s
 => => transferring dockerfile: 261B                                                                                               0.0s
 => [internal] load .dockerignore                                                                                                  0.0s
 => => transferring context: 2B                                                                                                    0.0s
 => resolve image config for docker.io/docker/dockerfile:1                                                                         4.7s
 => [auth] docker/dockerfile:pull token for registry-1.docker.io
...
...
...
 => [4/5] RUN pip3 install -r requirements.txt                                                                                     2.2s
 => [5/5] COPY . .                                                                                                                 0.2s
 => exporting to image                                                                                                             0.1s
 => => exporting layers                                                                                                            0.1s
 => => writing image sha256:198d992d9b59f16f3ff1e9f569d0bc7beb568ea927e99130b3a17c                                       0.0s
 => => naming to docker.io/library/dockerizing-flask                                                                               0.0s
(env) sonny@MacBook-Pro-khxng-sonny random_app %
ตอนนี้ก็สามารถ build Image ของเราได้เรียบร้อย ลองเช็คดูได้ด้วยคำสั่ง
$ docker imagesตอนนี้เราได้ build ตัว Docker Image ที่มีชื่อว่า dockerizing-flask เรียบร้อยแล้วครับ
REPOSITORY                  TAG           IMAGE ID       CREATED         SIZE
...
dockerizing-flask           latest        198d49922d9b   4 minutes ago   149MB
...
Push ตัว Image ไปที่ Docker Hub
เมื่อเรารันใน local ได้เรียบร้อย แต่ก็คงใช้ขุมพลังของ Docker ได้ไม่เต็มที่นัก ดังนั้นเราจะทำการ push ตัว Docker Image ของเราไปเก็บไว้ใน Docker Hub เพื่อแชร์ให้คนอื่นได้ใช้กันครับ ก็เปรียบเสมือนตอนที่เรา push ตัว Git repo ขึ้นไปบน GitHub นั้นแหละครับ
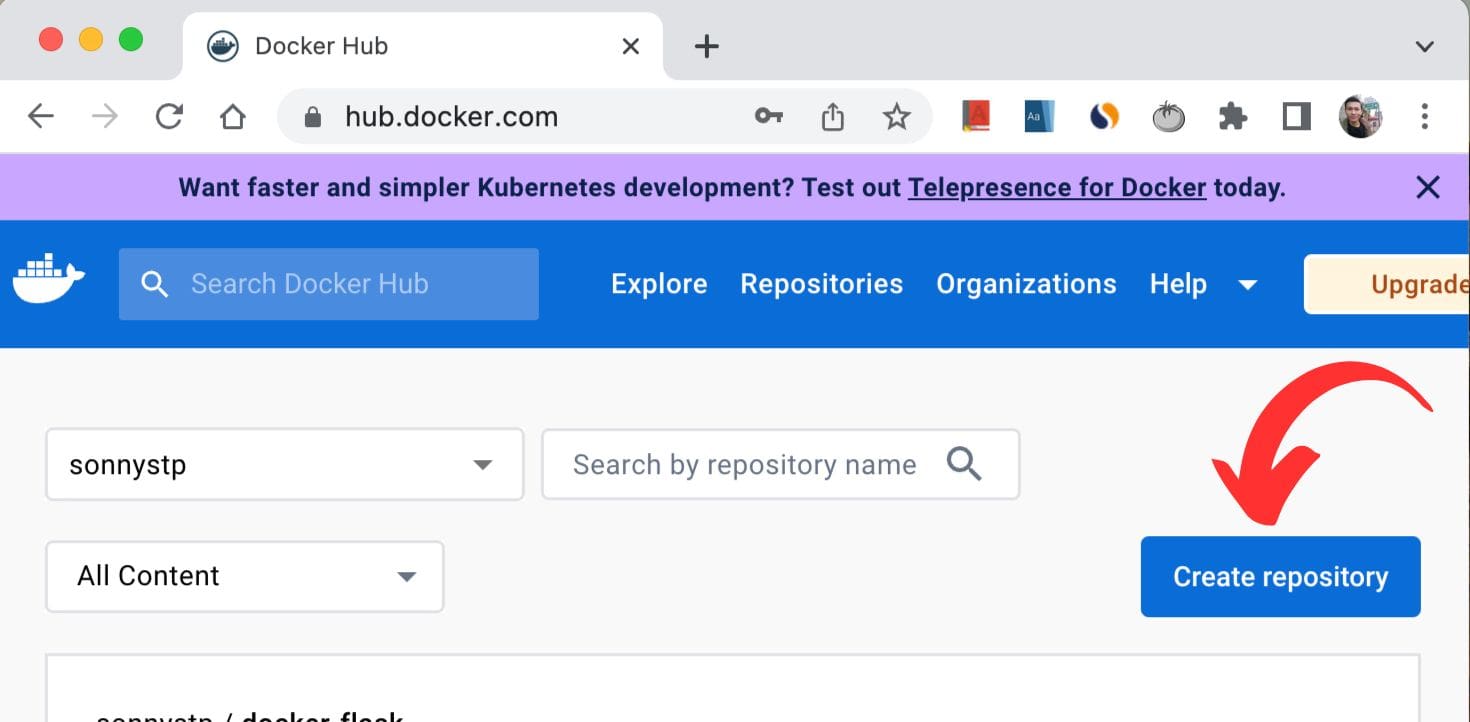
1. ไปที่ Docker Hub ถ้าย้งไม่มีบัญชีก็จัดการสมัครให้เรียบร้อย
2. ทำการ Create repository ได้เลย
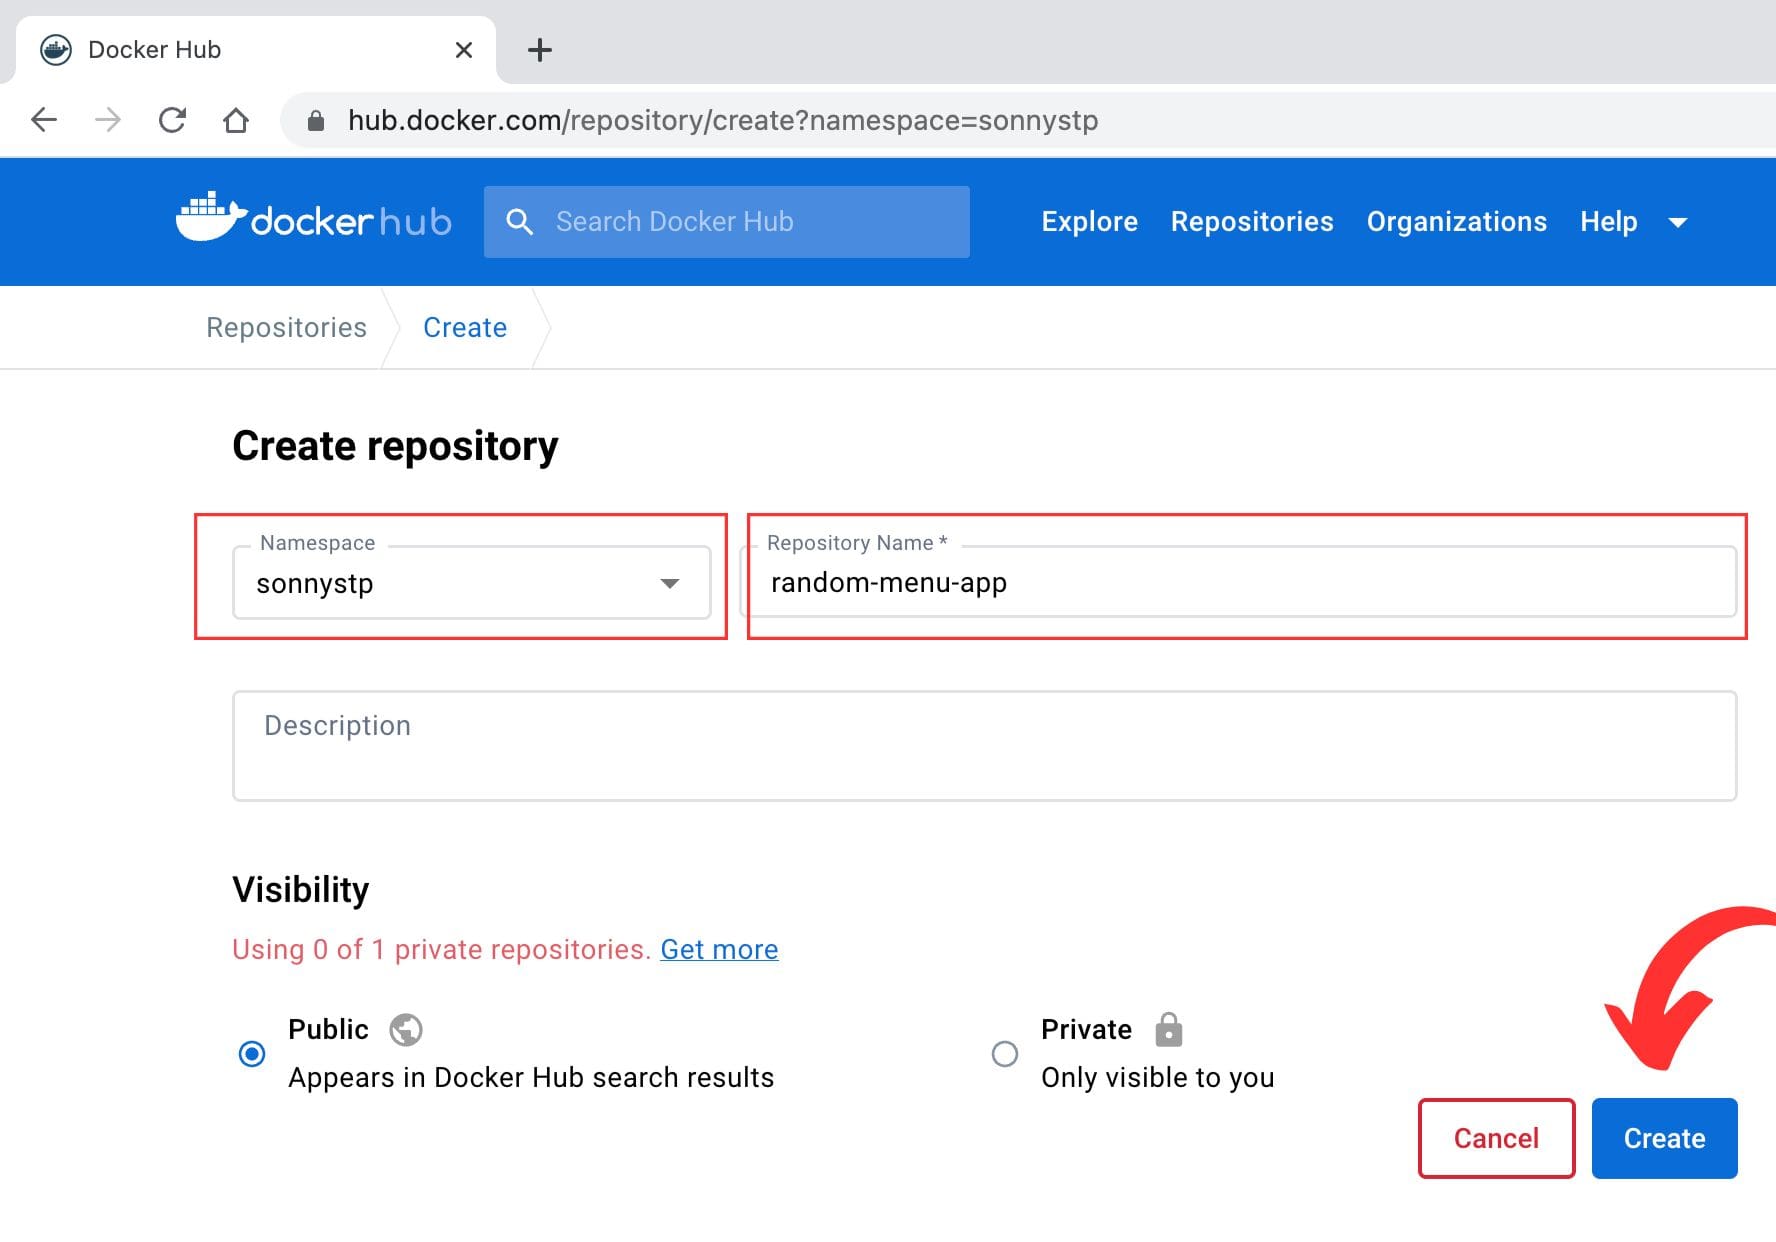
3. กำหนดชื่อ Docker repository ของเรา โดยในที่นี้ผมใช้ชื่อ random-menu-app และตั้งค่าเป็น public เพราะว่าผมทำเป็น tutorial และจะแชร์ repo นี้ให้คนอื่นได้ใช้ด้วย
จากนั้นเลือก Create ได้เลย
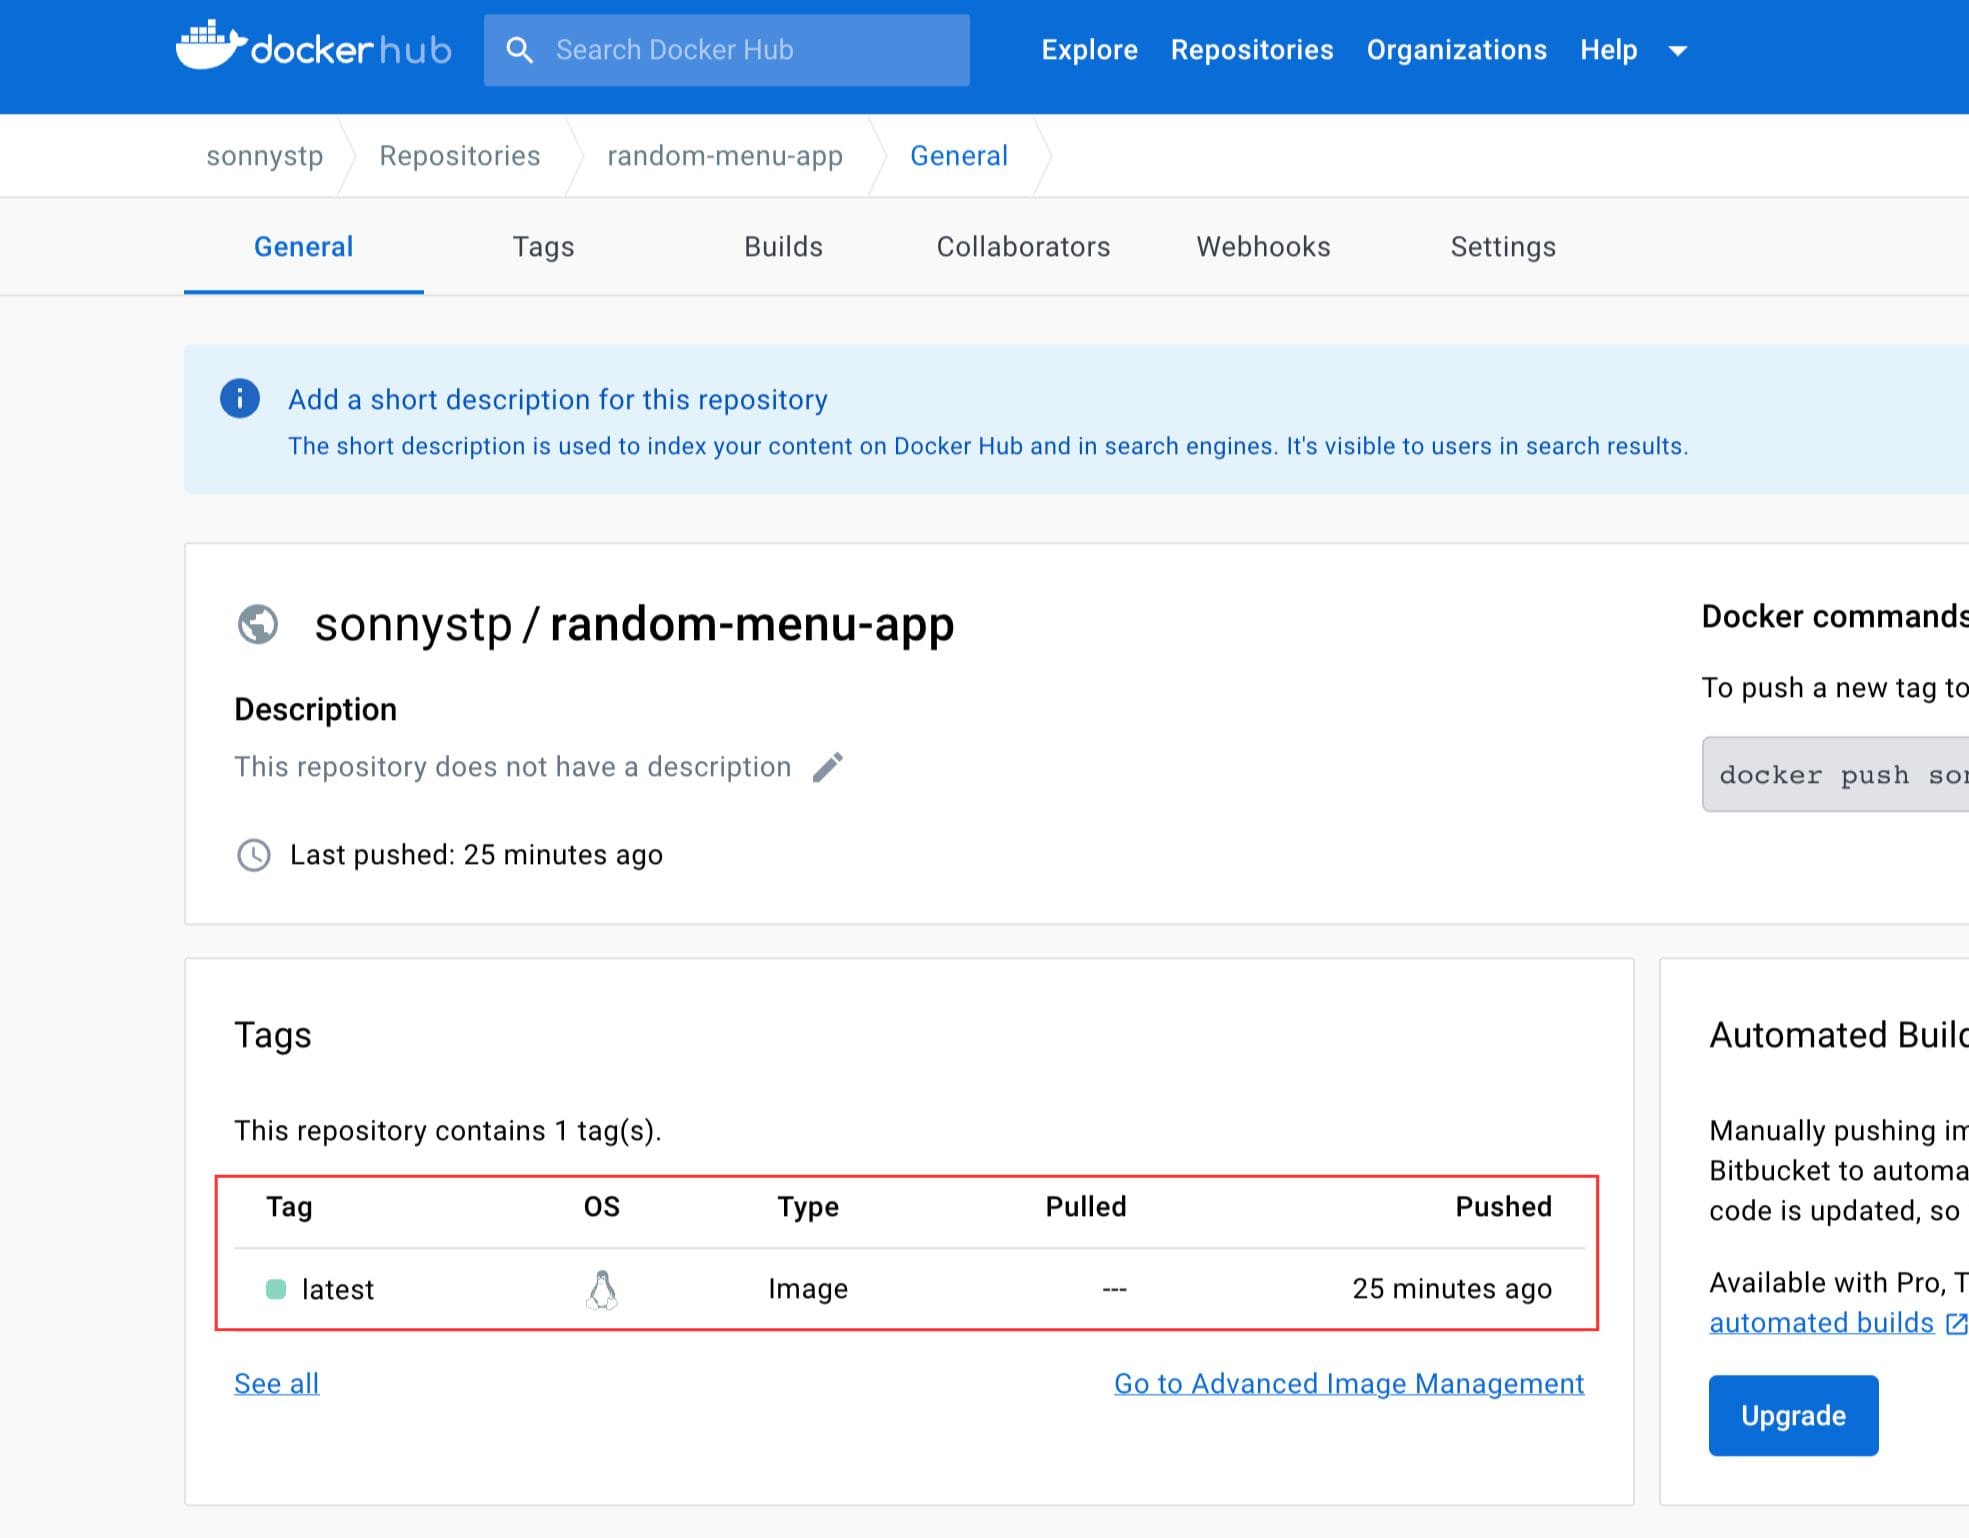
ตอนนี้ผมได้ repo ชื่อ random-app-menu เรียบร้อย

4. ทำการล็อกอิน Docker เพื่อให้ local computer ของเราเชื่อมกับ Docker โดยเราจะ push ผ่าน Terminal ตามปกติเลยครับ
$ docker loginโดยใส่ username และ password ที่เราได้สมัครใน Docker Hub ก่อนหน้าได้เลย
Authenticating with existing credentials...
Stored credentials invalid or expired
Login with your Docker ID to push and pull images from Docker Hub. If you don't have a Docker ID, head over to https://hub.docker.com to create one.
Username (my_username): my_username
Password:
Login Succeeded
ล็อกอินสำเร็จไม่มีปัญหา
4. Build Docker Image ขึ้นมาใหม่
$ docker build -t sonnystp/random-menu-app .จะได้
[+] Building 4.9s (16/16) FINISHED
 => [internal] load build definition from Dockerfile                                                                               0.0s
 => => transferring dockerfile: 261B                                                                                               0.0s
 => [internal] load .dockerignore                                                                                                  0.0s
 => => transferring context: 2B                                                                                                    0.0s
 => resolve image config for docker.io/docker/dockerfile:1                                                                         2.7s
 => [auth] docker/dockerfile:pull token for registry-1.docker.io                                                                   0.0s
 => CACHED docker-image://docker.io/docker/dockerfile:1@sha256:39b85bfa756a5feceb7372a817649eb272562a38360f4d6a7782a409b14    0.0s
 => [internal] load .dockerignore                                                                                                  0.0s
 => [internal] load build definition from Dockerfile                                                                               0.0s
 => [internal] load metadata for docker.io/library/python:3.9-slim-buster                                                          1.8s
 => [auth] library/python:pull token for registry-1.docker.io                                                                      0.0s
 => [1/5] FROM docker.io/library/python:3.9-slim-buster@sha256:1c5091a9ba001c8e182f56a740f26eb328b7aa3f2c1f7d974e2e05282f323    0.0s
 => [internal] load build context                                                                                                  0.1s
 => => transferring context: 187.22kB                                                                                              0.1s
 => CACHED [2/5] WORKDIR /app                                                                                                      0.0s
 => CACHED [3/5] COPY requirements.txt requirements.txt                                                                            0.0s
 => CACHED [4/5] RUN pip3 install -r requirements.txt                                                                              0.0s
 => CACHED [5/5] COPY . .                                                                                                          0.0s
 => exporting to image                                                                                                             0.0s
 => => exporting layers                                                                                                            0.0s
 => => writing image sha256:198d4922d9b59f16f3ff1e9f5bc7beb568ea928567e99130b3a17c                                       0.0s
 => => naming to docker.io/sonnystp/random-menu-app
5. Push Docker Image ไปที่ Docker Hub
$ docker push sonnystp/random-menu-appPush Docker Image สำเร็จ
Using default tag: latest
The push refers to repository [docker.io/sonnystp/random-menu-app]
b75b6ee8f6a: Pushed
6f61b1bf01c: Pushed
1774619b0fe8: Pushed
bcd6c2349c0: Pushed
39939c4e263: Mounted from library/python
28677d1bc363: Mounted from library/python
0c9c9653969: Mounted from library/python
00a3f4e3c76: Mounted from library/python
6d2fe774f1c: Mounted from library/python
latest: digest: sha256:77c1ffe6097ade4701cf14b7c1b2a2e8be797ef01f5febf69544k1e6a181095d size: 2206
โดยจะแสดงเป็นแท็ก latest ครับ แนะนำให้ใส่ชื่อ Tag ด้วยจะดี แต่โพสต์นี้เพื่อไม่ให้เนื้อหาหลุดจากคอนเซ็ปต์สำหรับ beginners โดยจะทำให้เรียบง่ายที่สุด แต่คงไว้ซึ่งแนวคิดและเนื้อหาโดยรวมที่เพื่อน ๆ สามารถนำไปต่อยอดในระดับสูงได้แน่นอนครับ
เพียงเท่านี้เพื่อน ๆ ก็สามารถสร้างและรันโปรเจคท์ Python ร่วมกับ Docker Container รวมทั้งสามารถ push ตัว image ไปเก็บไว้บน Docker Hub เพื่อแชร์ให้ Dev ท่านอื่น pull image เพื่อนำไปใช้งานได้เรียบร้อยครับ
แชร์บทความนี้
บทความที่คุณอาจสนใจ